
Introducing the Cerro Quitasol Hike
This post is part of Everything to Know Before Visiting Medellin, a collection of no-B.S., unique guides to an unforgettable stay in Colombia.
This post's about the Cerro Quitasol hike in Medellín. What's Cerro Quitasol? Well in Spanish, “cerro” means “hill” and “quitasol” literally means “sun-removing.” Perhaps it was named by people whose days ended every time the sun set behind it every evening. That’d make sense.
But when it comes to this hike, “Quitasol” makes no sense at all.
That’s because if you follow this recommended route, the whole way up you’ll be out in the open, exposed to the formidable forces of the Latin American sun. Make sure to protect yourself from with your own personal “quitasol,” be it sunscreen or a hat and long sleeves.
And make sure to be in good shape. The Cerro Quitasol hike is a beast—a 1200 meter elevation gain straight up the mountain, about 11 km return. On the bright side (or actually shaded side), whereas the way up is sun-scorched, the way down is entirely shaded. And the views are stupendous.
Quick Info
- Elevation: Up and down. Approx 1200 meters total elevation gain.
- Distance: 11 km, but count on more for getting “lost” from time to time and taking not the most direct route
- Difficulty: High. The trail is steep and unrelenting. If you're not in the greatest shape, it's still worth it to do even just half the hike. Many groups we passed by did so.
- Duration: From the metro station and back again, including breaks to swim and get refreshments at the bottom, it took us 7 hours. A hard-core friend who hustled up and down, jogging at times, did it in 5 hours.
- Reward: Amazing views all the way up, interesting pre-Hispanic path and ruins on the way down, and refreshing swimming area towards bottom of return. Oh, and good exercise and a tan.
- Bring: Sun protection, rain protection (depending on season), and lots of water.
- More Info: Take a look Chasing Adventure's post on Cerro Quitasol for more photos and inspiration.
Map
To minimize your risk of getting lost, download this map and save these waypoints before you head up the mountain, where cell service is limited. If you don’t know how to do so, check out our super-quick guide to using Google Maps offline here.
Cerro Quitasol Hike Guide
How to Get to Cerro Quitasol
The trailhead to the Cerro Quitasol hike is conveniently close to Niquia station, the last stop on metro line A, in the far north of Medellin.
The Climb Up
The first kilometer or so is uphill (and up stairs) through a completely safe residential neighborhood to the starting point indicated on the map.
There you’ll see a very obvious, wide, jagged trail going straight up the side of the mountain. From here on you’re going directly up.

Roughly half-way up, the trail becomes a softer pine path, then gets somewhat brushy towards the top.
At a few points we doubted if we were going the right way, but by sticking to the rule of thumb of “when in doubt, take the route that goes straight up” we made it to the viewpoint. Use the Cerro Quitasol Viewpoint marker on the map as a guide.

The Reward
The view of Medellin and the entire Aburra valley from the top of the Cerro Quitasol hike is spectacular.
So is the feeling of sitting down under a tree and resting your legs.
Back Down
Don’t go down the same way you came up!
Save your poor knees and sun-scorched skin by taking an alternate, less steep, easier-to-follow and more shaded route down.
You’ll find this trail to the east (or to your right when facing the mountain) of the viewpoint.
[Oct 2018 Update: Avery mentioned in the comments: "…make sure you turn right off the trail to head back down once you reach the grouping of pine trees at the overlook. Another trail has been recently cleared that continues to go up to the true summit and some farms and lead us astray for 1/2 hour or so."]
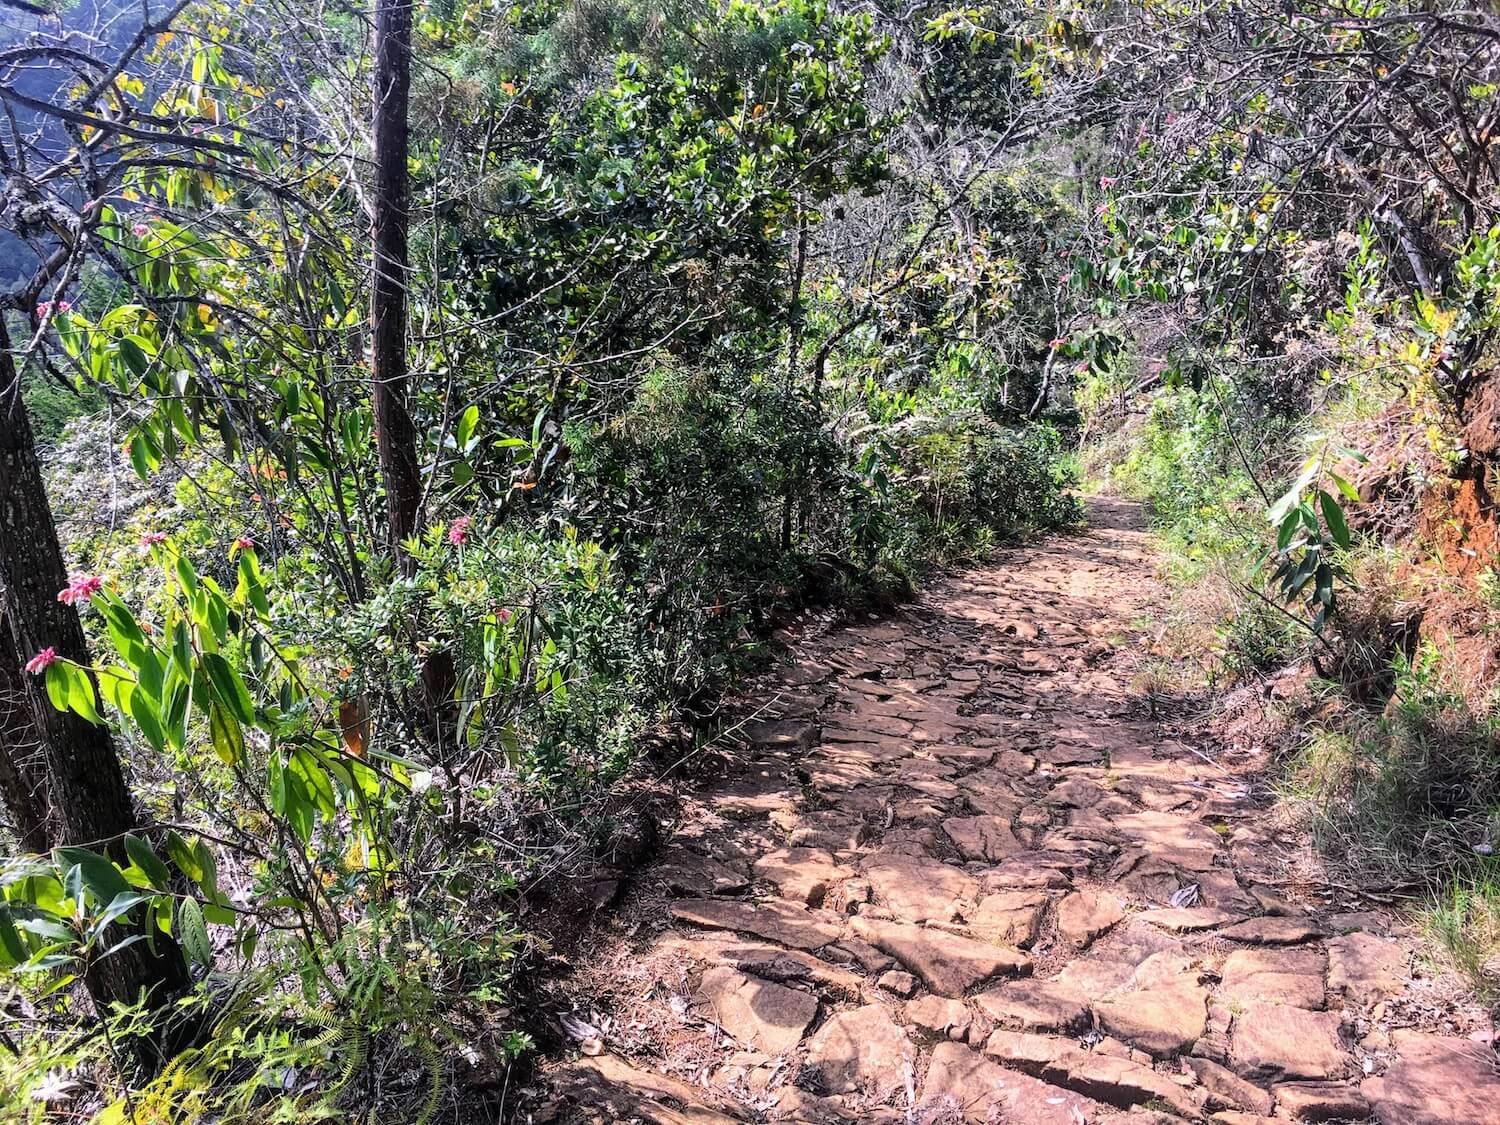
The trail back down will take you along the ridge hill on only a slight decline for a kilometer or two before starting to dip more steeply down the mountain. The top part of this trail is remarkably well-defined and easy to follow, especially compared to the top third of the trail you hiked up.
After a while (I know, “a while” is not super helpful, but I rather not misdirect you with an incorrect guess!), you’ll hit some clearings with ruins and abandoned houses. At this point the trail becomes much less clear. I don’t know what else to say but to try to go down from one ruin / abandoned house to the next.
A tip from reader Avery in the comments is, "Don’t trust the plastic markers, rather keep going down from ruin to ruin and you will find the stone road just fine!"

Within 5-10 minutes walking down this uncertain part of the trail, you’ll hit the incredible pre-Hispanic road. If you’re like me you’ll marvel at the work it must have required to build such a relatively smooth cobbled road up such a steep hill! From this point on, finding your way back to town is easy.
Another Reward!
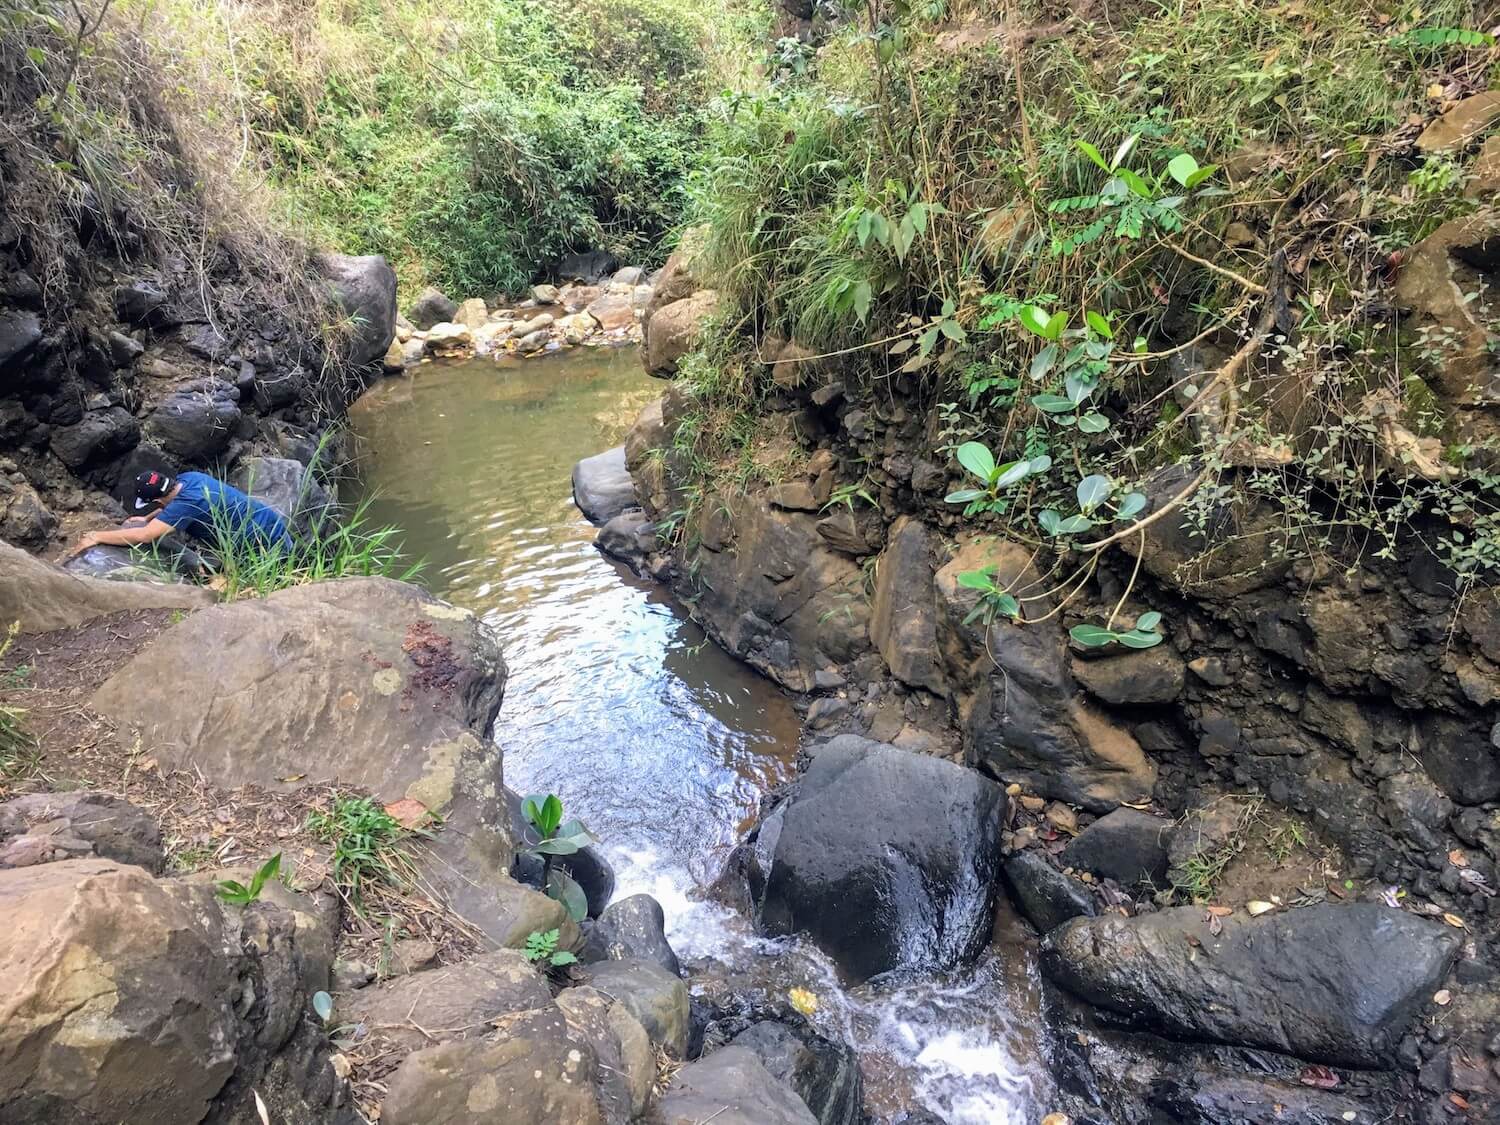
Towards the bottom third of your way down Cerro Quitasol, you’ll start hearing flowing water to your right and then see a canyon.
At various points there are trails that deviate from the main trail to go down it. We didn’t explore these due to time pressure, but we were told by other hikers that they all lead to swimming holes.
You needn’t detour to hit a swimming hole though. As I marked on the above map, the main trail eventually goes right through the stream. Here, or at whichever point slightly up or down stream, I highly recommend you take a dip.
An Après Hike
After crossing the stream, you’ll get to some more heavily used camping areas and biking paths. Getting back to the road, the last waypoint on the above map, is straightforward.
Once back on the road, we were surprised by how cool the neighborhood was that we walked through to get back to Niquia station. Not a single of the 50+ blogs we used to create our Huge Medellin Travel Guide mention this area, but it was super happening and full of tasty looking restaurants (even a vegan one), bars, and other shops. We didn’t stop for more than bottles of water because I was fasting, but I definitely plan to return to explore the area more fully. I recommend spending some time there for some après hike food and drink.
Videos
My buddy Paul from Travel Is Life joined me on the hike and put together this entertaining video summary:
And if you're still wondering whether to take on this hike, this drone video by The Science of Travel will inspire you:
Want More Medellin Hikes?
If you're looking for more ways to explore the nature that surrounds The City of Eternal Spring, check out our complete, and ever-expanding list of Medellín hikes. It includes hikes that have waterfalls, pyramids, prisons, and more.
Make a Magnificent Medellin Trip
For all the ingredients you need to put together a magnificent Medellin trip—where to stay, what to do, what to eat, where else to visit in Colombia—see our Medellin Travel Manual.
And if you have any questions, comments, or suggestions to share with other readers, please share them in the comments!
Thanks for the post!! Just did the hike yesterday! Suggestions are to make sure you turn right off the trail to head back down once you reach the grouping of pine trees at the overlook. Another trail has been recently cleared that continues to go up to the true summit and some farms and lead us astray for 1/2 hour or so.
Also, definitely a little confusing on the way down once you reach the ruins of houses. Your description was definitely spot-on. Don't trust the plastic markers, rather keep going down from ruin to ruin and you will find the stone road just fine!
Your name suits you perfectly, Avery, because that's a-very helpful piece of info! I've updated the post accordingly. Muchisimas gracias!
We hiked this yesterday.
Despite reading your blog beforehand we got carried away and continued up the new paths cleared by locals and farmers, leading us astray for 1/2 hour.
A handy hint for others, if you are walking up a steep clay track with trees, you’ve gone too far.
The tracks on Maps.Me are accurate, walk up the grey track and where it intersects with the white track, that’s where you turn right to descend down.
Beautiful views!
The booty is sore today but so worth it!
Thanks Ellie! Did you notice that if you continue on those paths you can apparently make it to a highway? I was thinking if I were to do the hike again I'd try that, then see about catching a bus back from there. Or maybe that's madness.
Anyway, glad you too (minus your booty) enjoyed the hike. All the best!
Hola! Question – if the hike UP is brutally sun-scorched and down is shaded, why not do it the other way around…? Or is that because it'll ruin your knees? Thanks!
Hola Sam. Yeah, I just find it more pleasant going down gentler slopes and don't mind (even prefer) a steep climb. Going up and down the covered, less steep route wouldn't be a bad idea, either.
Hey thank you for the hot tips. I did this hike today and can confirm the way down is more maintained. I only had to double back around the ruins area. Going up, the trail was almost overgrown at points. I kept going past the lookout point and the foliage got really thick; i was basically going up an arroyo. There is a potato farm at the top and the view was spectacular, but they were spraying fertilizer or pesticide. The guy who seemed to be running the farm said the pathways are free to use, but i did feel foolish up there in my shorts, looking lost. From the top, he said, it is basically equidistant to San Pedro (the next town over) or Niquía/Bello.